
Hi, Welcome to Part 2 of my WordPress MOT series; Optimise your site/improve site speed.
You can find the previous posts in the series here:
Optimise your site / improve site speed
Over time WordPress blogs can get a little… bloated. You end up with too many plugins, a big fat database, and a lot of code being loaded every time someone visits your site. Google takes into account loading times on their rankings, so it’s important to take it into consideration when you are doing site maintenance. Here are some tips to improve the size of your site, and some helpful plugins to speed things up.
The WP-Optimize plugin is one I install on a lot of blogs that I work on. It dramatically reduces the database size on first run, by removing old spam & unapproved comments, deleting old post revisions, and so on. It also optimises the tables themselves to reduce the loading speed of the database. You can opt to keep a number of weeks worth of data, and schedule it to run an auto-cleanup once a week, to keep your database trim. Pretty much everything WordPress does involves loading or writing information to the database so keeping the database size down is a good way to get started with optimising your site.
Another useful plugin is P3 (Plugin Performance Profiler) which helps you to identify which plugins are slowing down your site the most. The main thing to note with this is that Jetpack is a bit of a false positive due to the amount of plugins it replaces. You’ll be able to see which plugins on which posts are using the most resources, and so on.
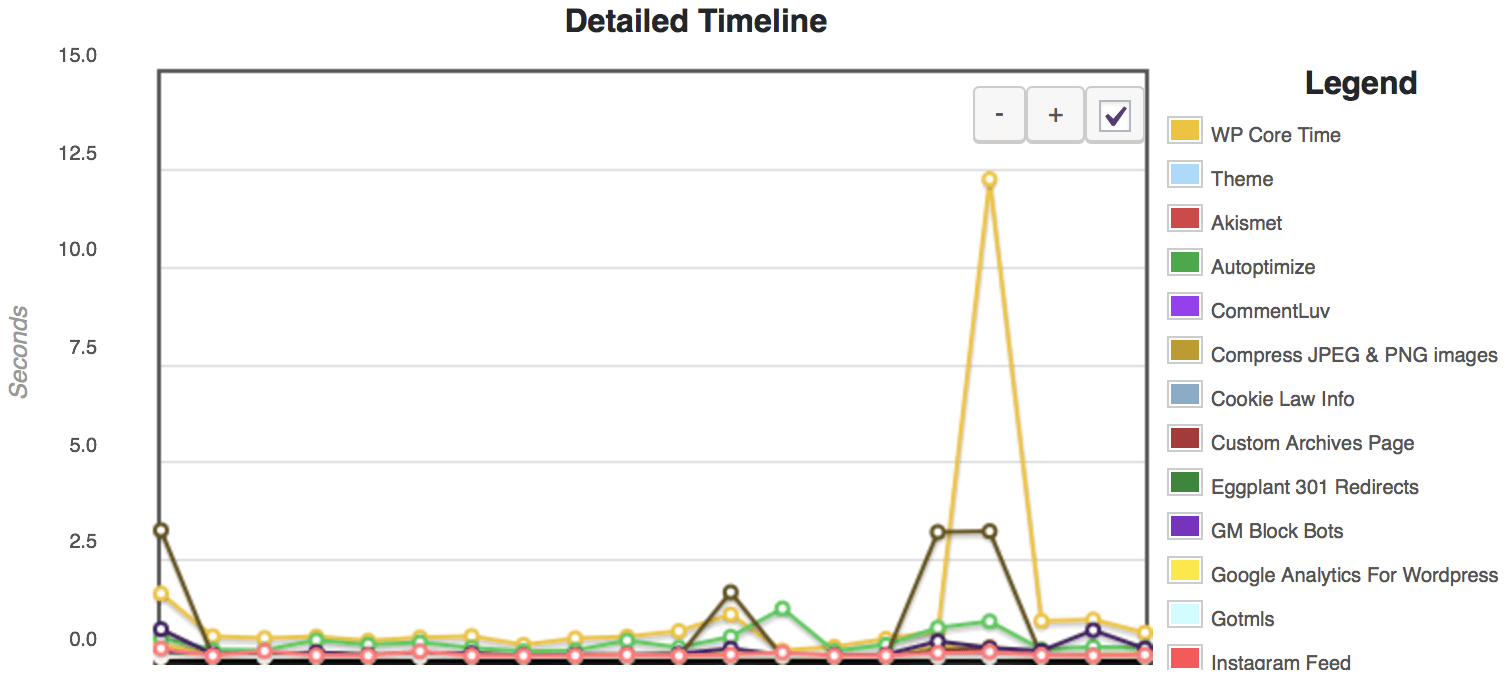
Once you know which plugins are using the most resources, you can decide how important they are to you, and look for alternatives if possible – or get rid of them if they aren’t worth it.
It’s also a good idea to remove unused plugins, or those which are duplicating functionality. If you have Jetpack installed it’s a good idea to get to know it and read up on each module, so you can deactivate modules you don’t want to use, and delete plugins that you have which duplicate Jetpack’s functionality. I’ve seen a lot of blogs which have two or more plugins installed doing the same thing, which just isn’t necessary.
To compress and minify the code that is loaded every time someone visits your site, and improve site speed, I use a plugin called Autooptimize. It basically does a bunch of fancy stuff that makes your site a bit faster, and makes the Google PageSpeed Insights test a bit happier.
Use the right image size. In your blog posts, there is no point embedding an image that is wider than your maximum content width. By going to Settings – Media, you can set the width of the Large size to match the content width of your posts. You can find out your content width by inspecting your website using developer tools – click here to see a video showing how to do that.
Make sure your images are compressed – use a plugin such as “Compress JPEG & PNG images” by TinyPNG, “ShortPixel Image Optimizer”, or “WP Smush – Image Optimisation”. I use the TinyPNG one for every day use on Mama Geek as I find that it gets the best compression without visibly changing the photographs. To compress my entire media library initially I used the ShortPixel plugin and paid for bulk optimisation. Smush It is a free alternative for bulk optimising your library, but you have to do it 50 images at a time.
Lastly, make sure you are using a caching plugin to improve site loading speeds. This is an important one, it makes a big difference! I prefer WP Super Cache as it plays nicely with other plugins including Jetpack, and it really easy to use. Just remember when you are making changes to widgets, etc, to delete the cache to see the changes – or temporarily deactivate caching while working on the site – otherwise you won’t see the changes instantly.
Coming up in Part 3… Keep it secure & back it up. It should be up in a few days.
Need more help? Feel free to get in touch via Zoe Corkhill Web Design – advice is always free!
Pin it for later…


Thanks for this Zoe, I would love for you to go into my blog and check all my plugins and install what I actually need x